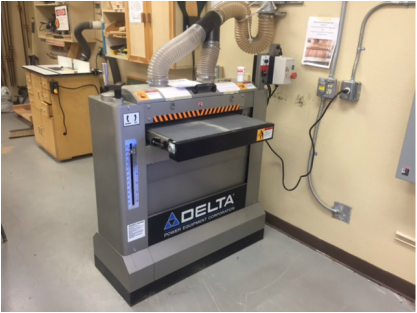
Delta 31-481 Dual Drum Sander
Click on the button to view or download Operating Manual.
The following is posted near the machine:
This machine shall not be used for the following:
ADJUST ELEVATION CRANK NO MORE THAN 1/8 TURN BETWEEN PASSES.
Prior to using this machine for the first time, the following is required:
Until further notice, only a club officer or qualified Monitor are authorized to make adjustments other than table elevation.
This machine shall not be used for the following:
- Removing paint and other finishes from wood.
- Sanding wet, sappy or resinous woods.
- Sanding wood with embedded nails, screws or other debris.
- Sanding glue-ups that have not dried at least 24 hours. (Scrape off as much of the squeeze-out as possible before sanding.)
- Using the machine like a surface planner to significantly reduce the thickness of a piece.
- Sanding boards that are less than six (6) inches long and one-quarter (¼) inch thick.
ADJUST ELEVATION CRANK NO MORE THAN 1/8 TURN BETWEEN PASSES.
Prior to using this machine for the first time, the following is required:
- Read the Operating Instructions Pages 2 through 4 and Pages 13 through 16. (Available on the club’s website. A paper copy is attached to the machine and another is in the cabinet next to the computer.)
- A checkout from a qualified Monitor, Lead Monitor or club officer.
Until further notice, only a club officer or qualified Monitor are authorized to make adjustments other than table elevation.
For Monitors
- The monitor on duty is to control the key that unlocks the power connector. When a member comes to you and wants to operate the machine, please do the following before opening the lock:
- Ask the member to read the notes affixed to the machine.
- Both the member and monitor inspect the condition of the sanding strips.
- Ensure the material the member wants to sand is not on the banned list, i.e. paint/finish removal, wet/sappy woods, etc.
- When a member is done using the machine, both the member and monitor inspect the sanding strips and place the lock on the power connector.
- Other than using the elevation crank, no adjustments are allowed. The drum height adjustment screws are set appropriate to the grits on the two drums and must not be changed.
CONVEYOR SPEED
The variable speed knob allows you to increase the feed rate from 0–22 FPM. The correct speed to use depends on the type of stock you are using (hardwood vs. softwood) and the stage of finish you are at with that piece. As a general rule, a slower feed rate sands the surface smoother, but runs the risk of burning the wood; a faster feed rate removes material faster, but runs the risk of overloading the motor. Use trial an error to determine the best settings for yourspecific applications.
FEED ANGLE
Some pieces, because of their dimensions, will need to be fed into the machine at a 90º angle (perpendicular to the drums). However, even a slight offset angle of the stock will provide for more effective stock removal. The optimum feeding angle is about 60º. Angling the workpiece for stock removal provides other advantages, such as less loading of certain areas of the drums due to glue lines or mineral streaks in the stock, more even wear of abrasive strips, potentially faster feed rates, and lighter loads on the motor. Note, however, that to get the best final finish the stock should be fed through the machine so it will be sanded in line with the grain of the wood on the final one or two passes.
FEED AREA
In addition to considering feed angle, when possible, avoid using the outer two inches of the sanding drums. Running pieces through the machine in those areas can cause premature failure of the sanding strips because they are fragile near where they attach to the drum.

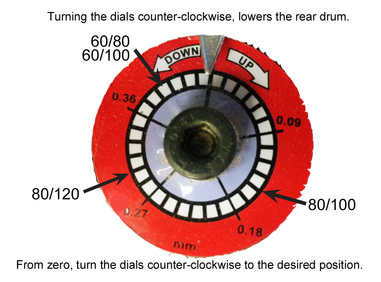
Rear drum height settings.
The settings are changed only when changing grits on one or both drums. If you think the settings are wrong, or you think the sanding strips need to be replaced, take the machine out of service and notify a monitor or club officer.
